指定Test Runner为Android JUnit Test Runner
前面介绍的JUnit3测试和Android基本测试,都基于Instrumentation Test Runner,之后谷歌又推出了Android JUnit Test Runner。根据官方的资料,前者只支持JUnit3,而后者还可以支持JUnit4。
http://developer.android.com/intl/zh-cn/tools/testing-support-library/index.html
在app模块的build.gradle中,可以指定Test Runner为Android JUnit Test Runner,写法如下。在dependencies中,testCompile表示JUnit测试时编译,androidTestCompile则表示Android Instrumentation Test时编译。
-
android { -
defaultConfig { -
// ... -
testInstrumentationRunner "android.support.test.runner.AndroidJUnitRunner" -
} -
packagingOptions { -
exclude 'LICENSE.txt' -
} -
} -
dependencies { -
androidTestCompile 'com.android.support.test:runner:0.2' -
}
配置完成后,即可运行JUnit4测试。除了代码格式不同,其他操作和前面的JUnit3一样,不再重复。
测试设备上的Test Runner
运行测试后,执行adb指令
adb shell pm list instrumentation
可以看到所有Test Runner
instrumentation:com.example.android.apis/.app.LocalSampleInstrumentation (target=com.example.android.apis)instrumentation:com.jzj1993.unittest.test/android.support.test.runner.AndroidJUnitRunner (target=com.jzj1993.unittest)
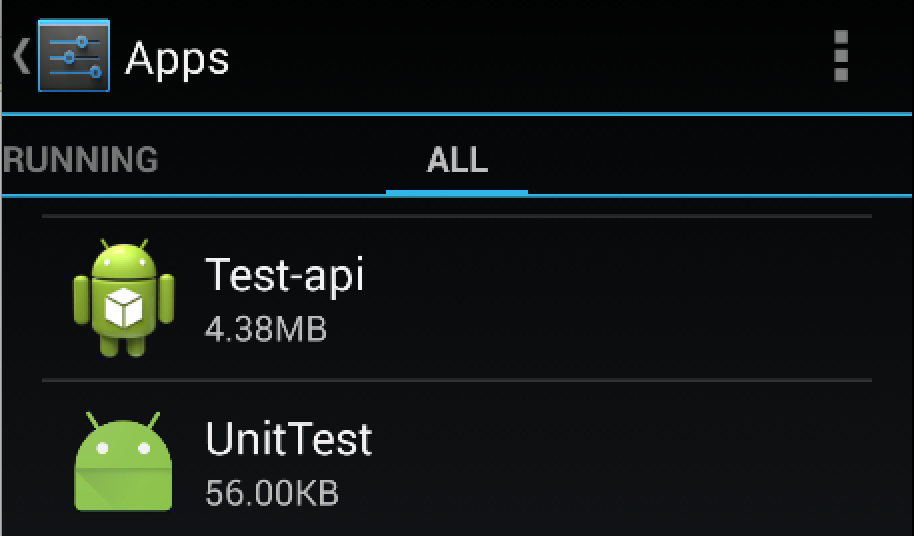
还是在设置的所有应用中,可以看到Android JUnit Test Runner,其名称为Test-api,如图。
基于Espresso的测试
Android的测试,除了直接调用相关代码,还有个很常见的途径,就是通过交互界面来测试。如果直接用Instrumentation发送点击等事件来测试,实在非常麻烦。这时可以利用谷歌官方推出的开源框架Espresso做测试。
这里举一个最简单的带UI交互的测试例子。
配置espresso
Espresso基于AndroidJUnitRunner,因此需要进行设置;AndroidJUnitRunner中如果需要获取Activity实例,还需要TestRules包的支持。在build.gradle中包含AndroidJUnitRunner、TestRules和Espresso的完整配置如下。
-
apply plugin: 'com.android.application' -
android { -
defaultConfig { -
// ... -
testInstrumentationRunner "android.support.test.runner.AndroidJUnitRunner" -
} -
packagingOptions { -
exclude 'LICENSE.txt' -
} -
} -
dependencies { -
// ... -
// 如果依赖项中有appcompat,尽量使用22.0.0,或解决依赖冲突 -
compile 'com.android.support:appcompat-v7:22.0.0' -
androidTestCompile 'com.android.support.test:runner:0.2' -
androidTestCompile 'com.android.support.test:rules:0.2' -
androidTestCompile 'com.android.support.test.espresso:espresso-core:2.1' -
}
依赖冲突解决
注意,在一个稍复杂的项目中配置Espresso,很容易产生依赖项冲突。对于espresso-core:2.1,如果项目的依赖项中有appcompat-v7,尽可能将其版本改为22.0.0。也可以参考下文尝试解决。
《Gradle依赖项学习总结,dependencies、transitive、force、exclude的使用与依赖冲突解决》
http://wiki.sankuai.com/pages/viewpage.action?pageId=404573094
主要的两个冲突项是hamcrest-core和support-annotations,以下是我实际应用到一个项目中的gradle依赖项配置,可供参考。每个包的版本改动,都有可能导致冲突或不兼容。
-
configurations.all { -
resolutionStrategy { -
force 'org.hamcrest:hamcrest-core:1.1' -
force 'com.android.support:support-annotations:22.0.0' -
} -
} -
dependencies { -
// ... -
androidTestCompile 'com.android.support.test:runner:0.2' -
androidTestCompile 'com.android.support.test:rules:0.2' -
androidTestCompile 'com.android.support.test.espresso:espresso-core:2.1' -
}
创建待测试项目
这里创建一个TextView和一个Button,点击Button时TextView中的文字改变。activity_main.xml文件如下:
-
<LinearLayout xmlns:android="http://schemas.android.com/apk/res/android" -
android:layout_width="match_parent" -
android:layout_height="match_parent" -
android:gravity="center_horizontal" -
android:orientation="vertical"> -
<TextView -
android:id="@+id/text" -
android:layout_width="wrap_content" -
android:layout_height="wrap_content" -
android:text="Text" -
android:textSize="25sp" /> -
<Button -
android:id="@+id/button" -
android:layout_width="wrap_content" -
android:layout_height="wrap_content" -
android:text="Button" /> -
</LinearLayout>
对应的MainActivity如下:
-
public class MainActivity extends Activity { -
@Override -
protected void onCreate(Bundle savedInstanceState) { -
super.onCreate(savedInstanceState); -
setContentView(R.layout.activity_main); -
final TextView textView = (TextView) findViewById(R.id.text); -
Button button = (Button) findViewById(R.id.button); -
button.setOnClickListener(new View.OnClickListener() { -
@Override -
public void onClick(View v) { -
textView.setText("Hello Android Test!"); -
} -
}); -
} -
}
创建测试类
在androidTest/java目录下创建一个MainActivityTest类。测试类中有一个TestCase,其作用是点击R.id.button控件,然后检测文本框是否展示了预期的文本。
-
package com.jzj1993.unittest; -
import android.support.test.rule.ActivityTestRule; -
import android.support.test.runner.AndroidJUnit4; -
import android.test.suitebuilder.annotation.LargeTest; -
import org.junit.Rule; -
import org.junit.Test; -
import org.junit.runner.RunWith; -
import static android.support.test.espresso.Espresso.onView; -
import static android.support.test.espresso.action.ViewActions.click; -
import static android.support.test.espresso.assertion.ViewAssertions.matches; -
import static android.support.test.espresso.matcher.ViewMatchers.withId; -
import static android.support.test.espresso.matcher.ViewMatchers.withText; -
@RunWith(AndroidJUnit4.class) -
@LargeTest -
public class MainActivityTest { -
@Rule -
public ActivityTestRule<MainActivity> mActivityRule = new ActivityTestRule<>(MainActivity.class); -
@Test -
public void sayHello() throws Exception { -
onView(withId(R.id.button)).perform(click()); -
onView(withId(R.id.text)).check(matches(withText("Hello Android Test!"))); -
Thread.sleep(5000); -
} -
}
运行测试
运行测试的方法和前面一样。运行时,可以在Android设备上看到测试效果,按钮被点击,于是文本框展示指定的文本。延时5s测试执行完成后,App退出。Run和Event Log窗口中提示测试通过。

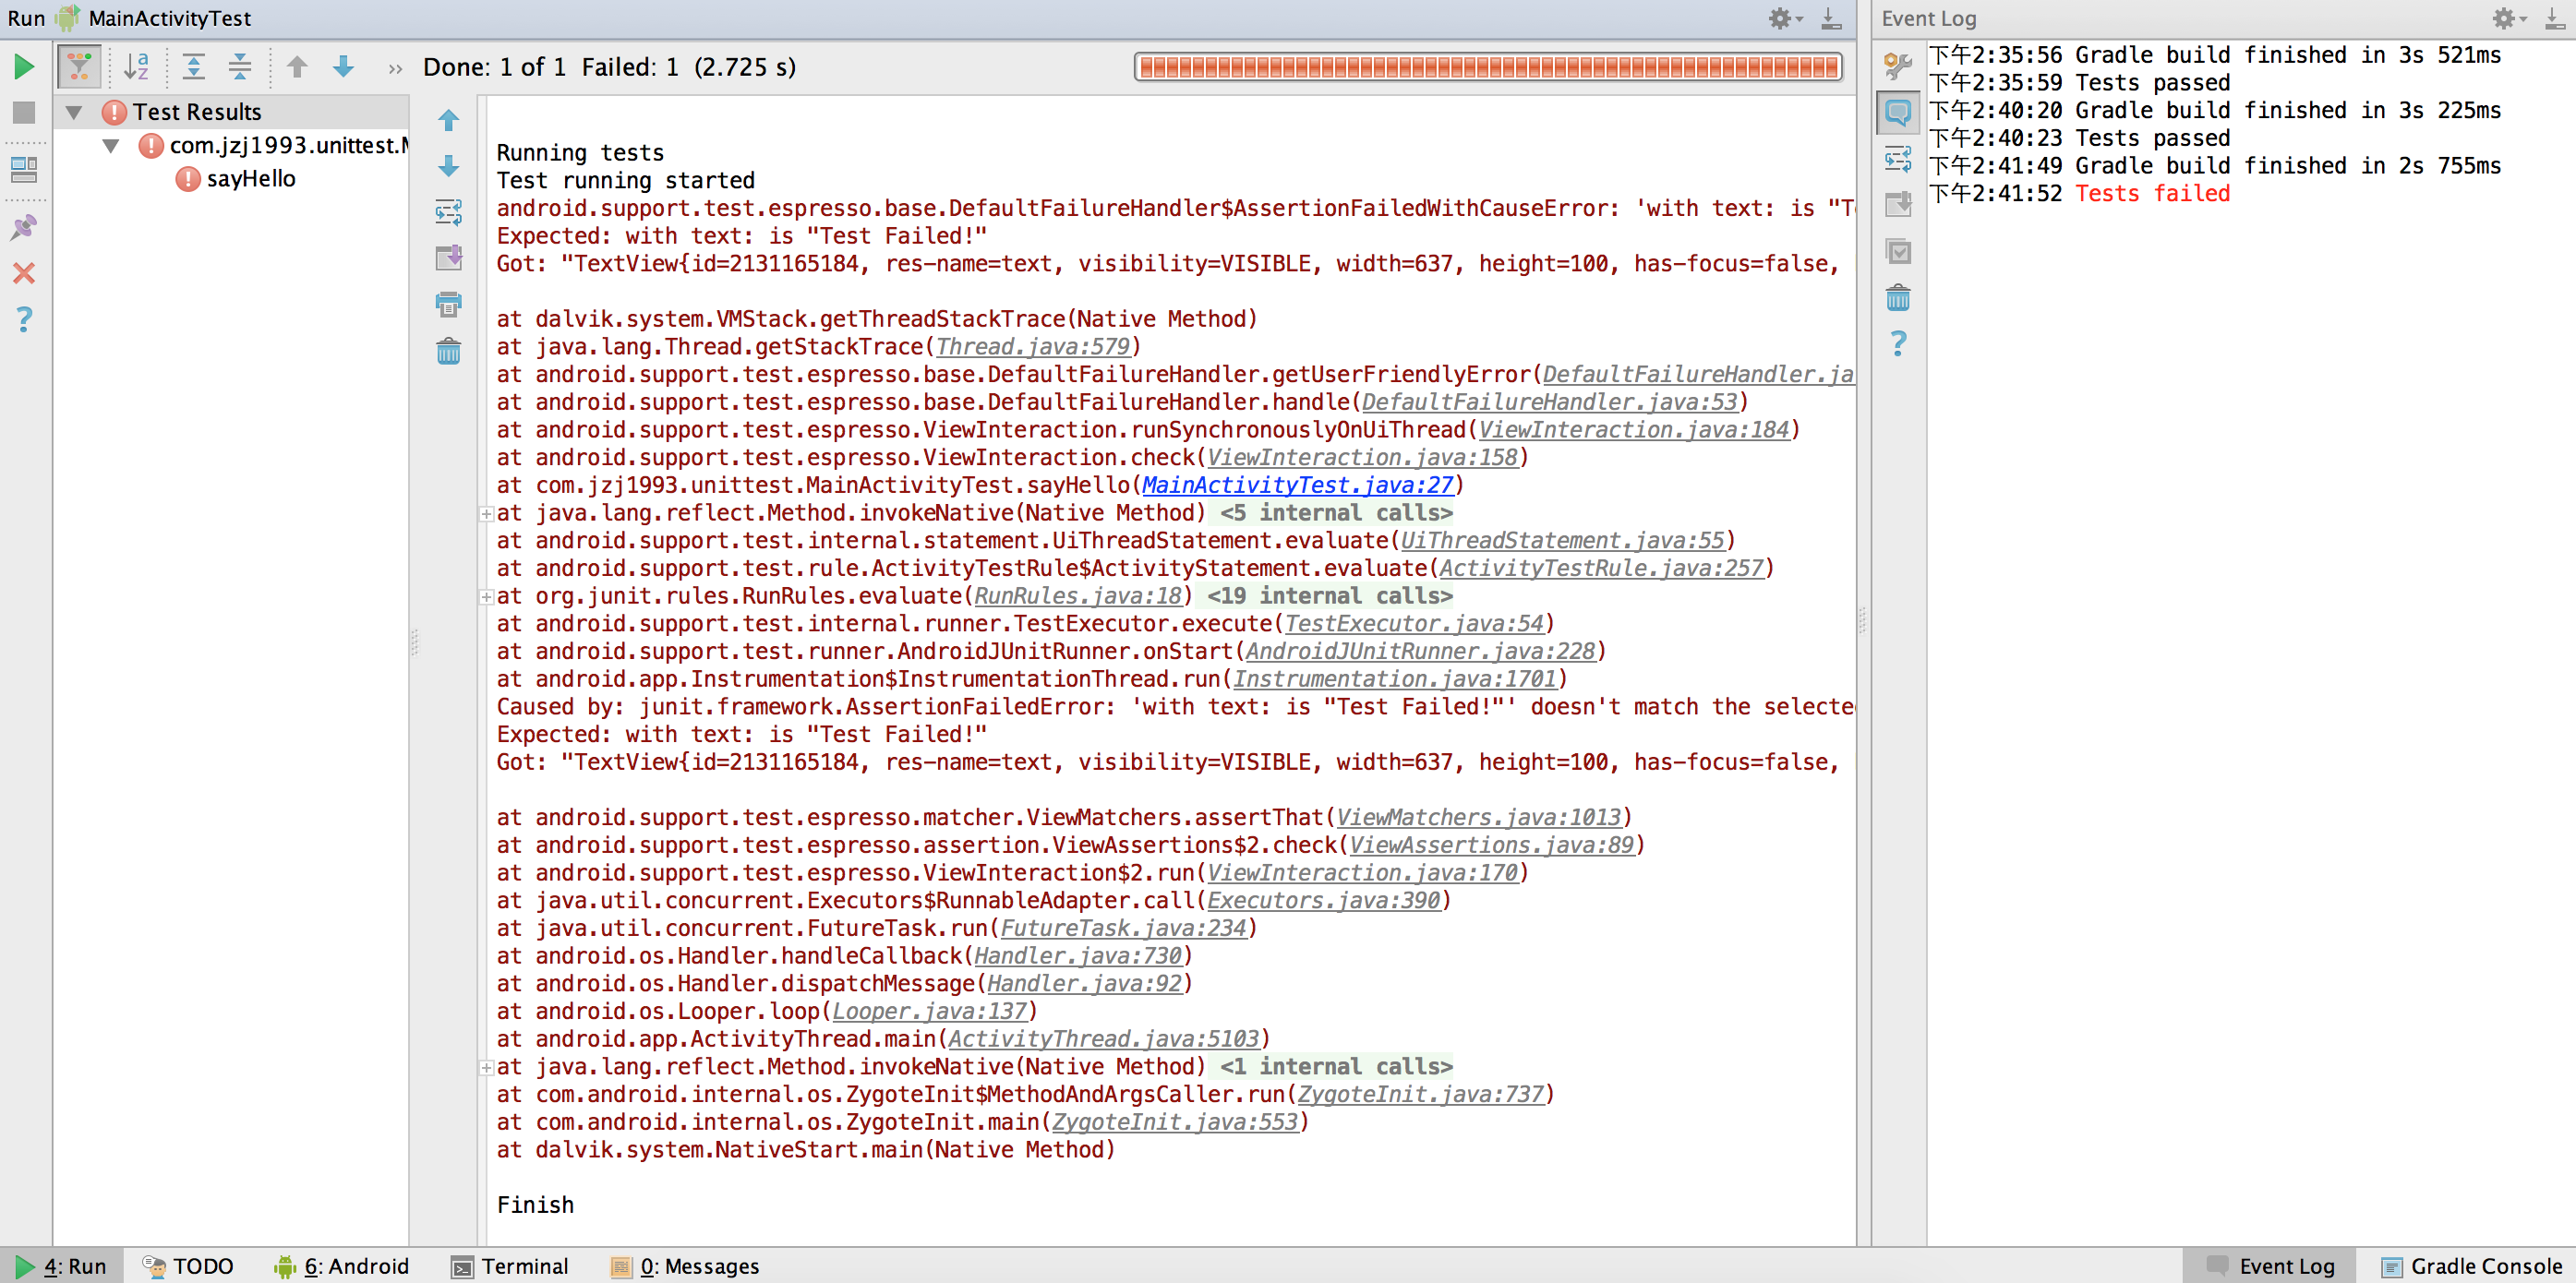
测试失败的情况
修改测试方法的文本,测试就会失败。
@Testpublic void sayHello() {onView(withId(R.id.button)).perform(click());onView(withId(R.id.text)).check(matches(withText("Test Failed!")));}